Defining Project Level Language Labels
Introduction
When importing multilingual files, it is useful to have a flag in your file that indicates which language each record belongs to.
This page explains how you can define project specific language labels in your project for use during import.
Note: Project level language labels are best used for labels that are unusual or specific to a given project. For more common or universal language labels, it is better to define these at the company level so that they are made available to all projects within the company. You can find instructions on creating company level language labels here.
Steps
- From the Codeit Project Dashboard, click the "Administration" button in the top Ribbon Menu
- From the list of projects displayed, select the project you want to add language labels to (or click Add New Project button to create a new project).
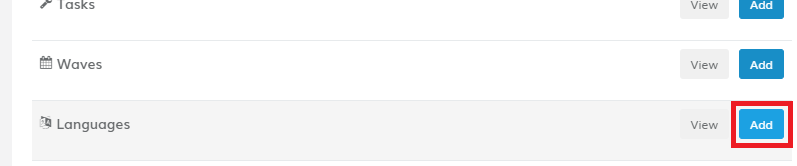
- Click the "Add" button from within the "Languages" section
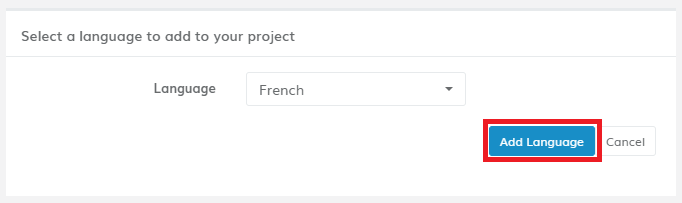
- Select a language to add and click the "Add Language" button
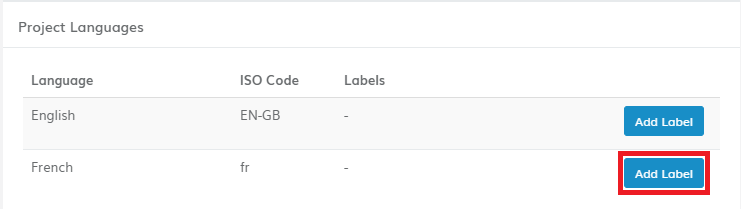
- Now that the language is assigned to your project, you can now add labels against by clicking the "Add Label" button
- Enter the label you want to assign to the selected language

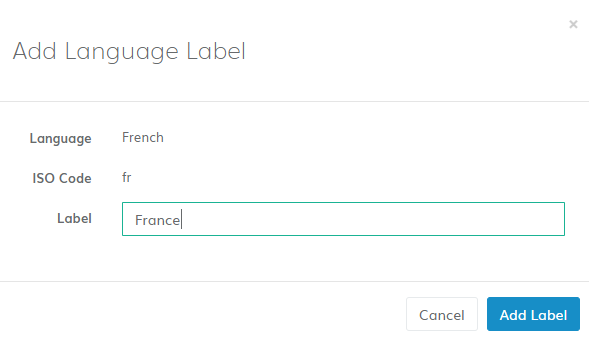
In this example, we have assigned the label "France" to the French language for this project.
Therefore, any records containing "France" within the selected Language Field will be automatically assigned to the French language on import.