Adding, Editing and Removing Codes
You no longer need to switch to "Edit Mode" to add, edit or remove codes. There are a number of ways to add codes to the codeframe.
Adding a Single Code
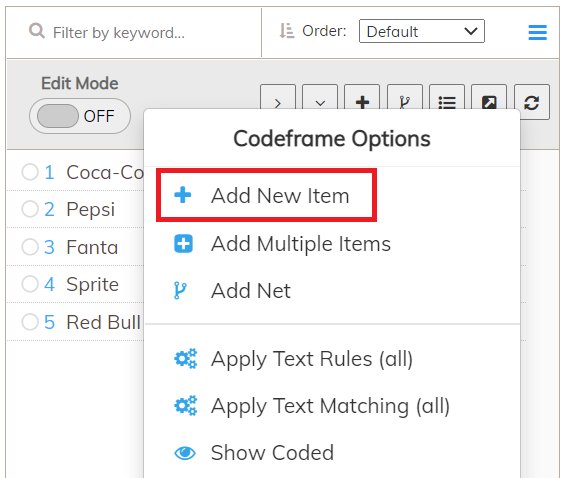
To add a single code, right-click on the codeframe (left) panel in the top toolbar area and select "Add New Item"
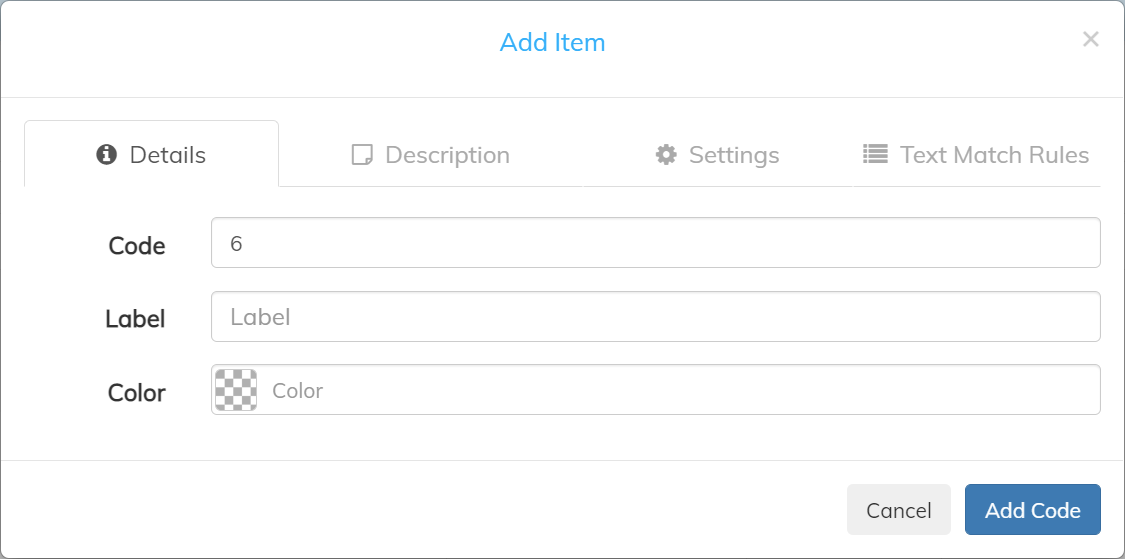
You can then choose the Code (any non-existing Code) and Label (any non-existing Label):
Adding Multiple Codes
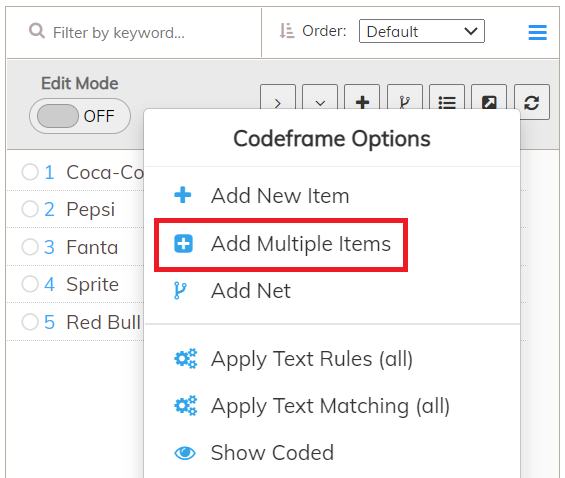
You can also add multiple items by right-clicking in the codeframe toolbar and select "Add Multiple Items"
You can then add multiple items:
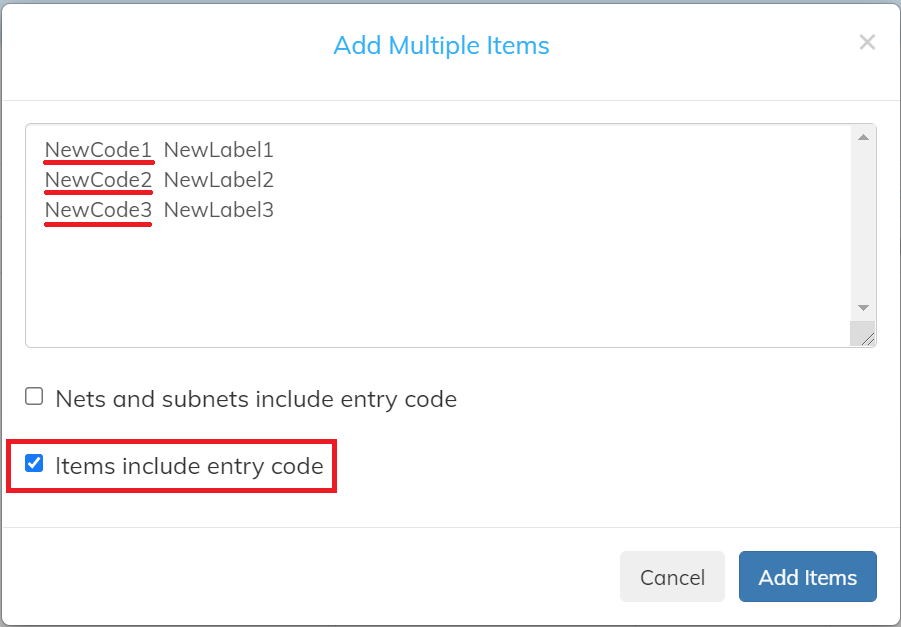
The checkbox "Items include entry code" allows you to specify if each new line has a Code or a Label, or just a Label. If the checkbox is unticked, the Code will be automatically calculated from existing codeframe items.
Adding Codes Before Existing Codes
New codes are automatically added to the end of the codeframe. To add a code before an existing code, right-click on the existing code and select "Add New Item Before..."
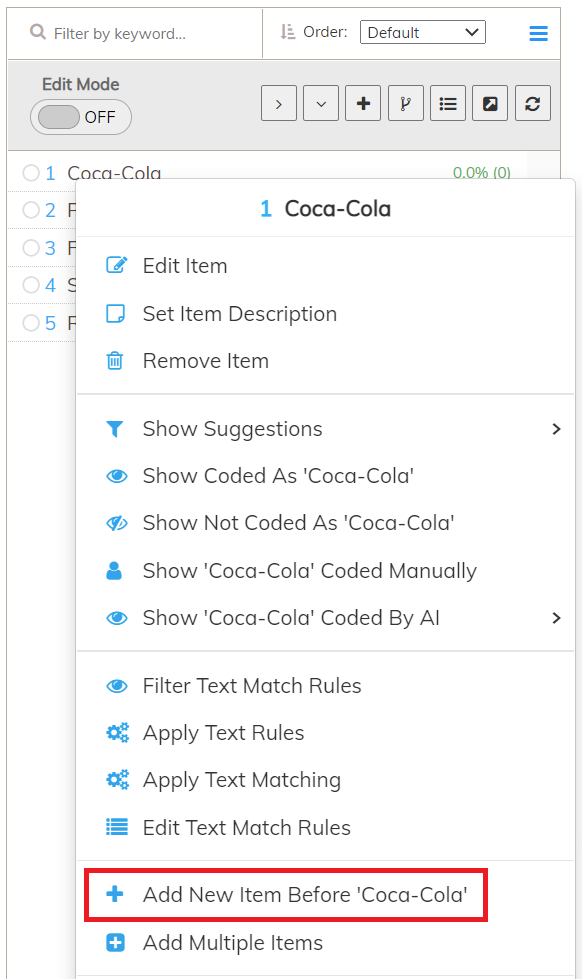
The "Add Item" dialog will be displayed and on clicking "Add Item", the new code will be inserted into the correct position in the codeframe.
Adding Codes to a Net
You can also add codeframe items to a Net. Right-click on a Net and select "Add Item To Net" or "Add Multiple Items To Net"
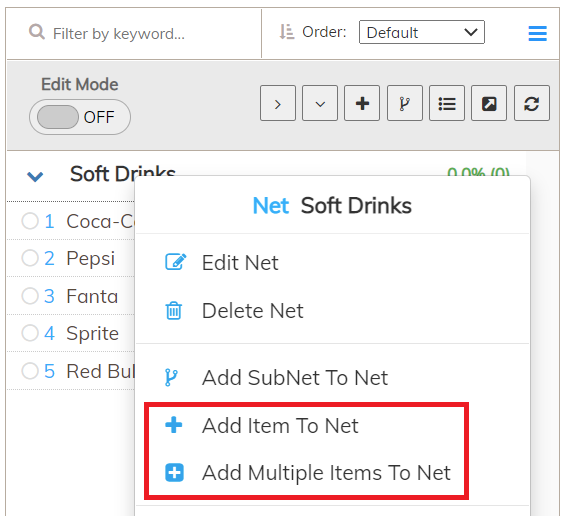
The dialogs are then the same as previously explained.
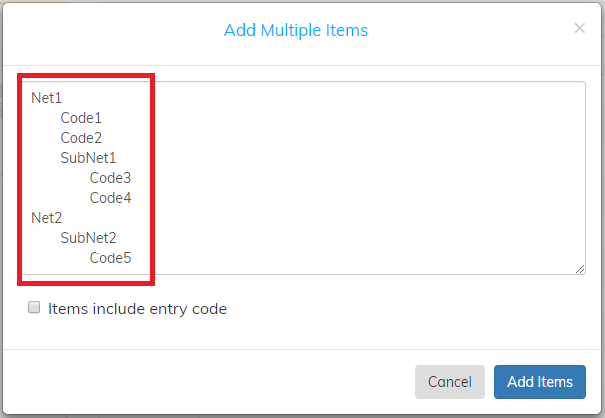
Finally, you can directly paste a netted codeframe in the "Add Multiple Items" dialog, with tabulation to indicate the different levels:
Editing a Code
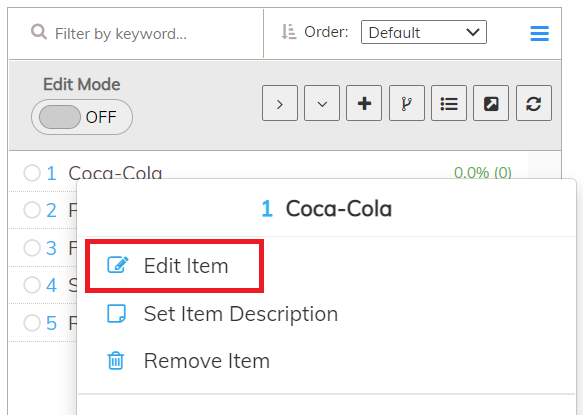
To edit an item, right-click on it and select "Edit Item".
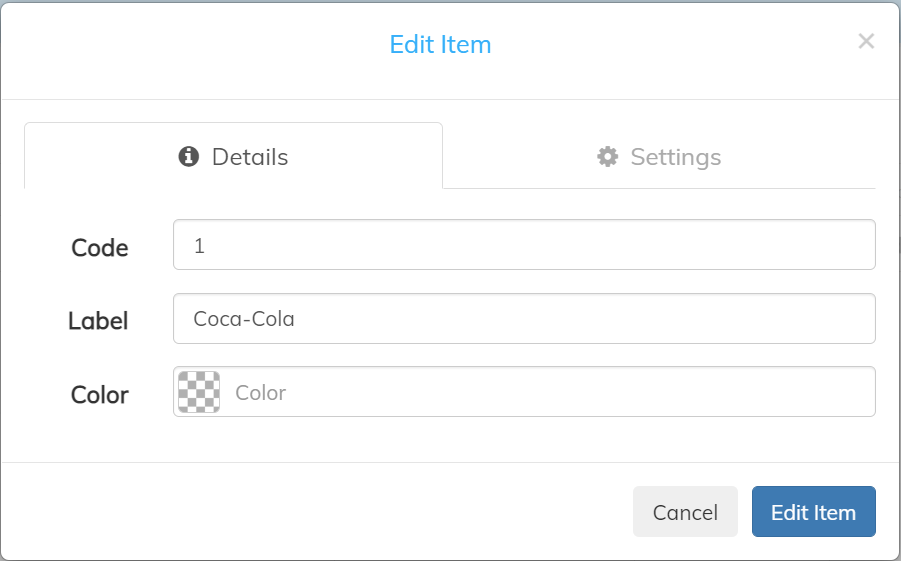
You can then change the Code (any non-existing Code) and/or Label (any non-existing Label):
Removing a Code
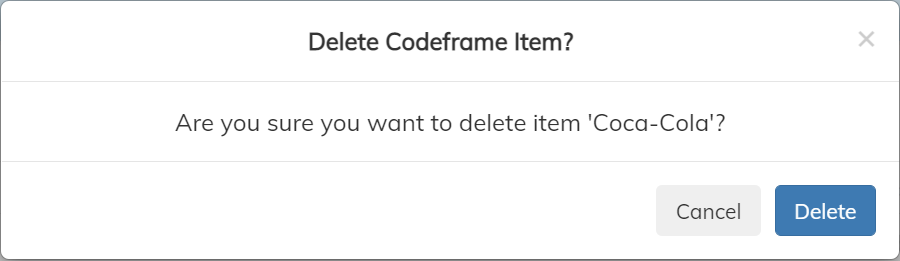
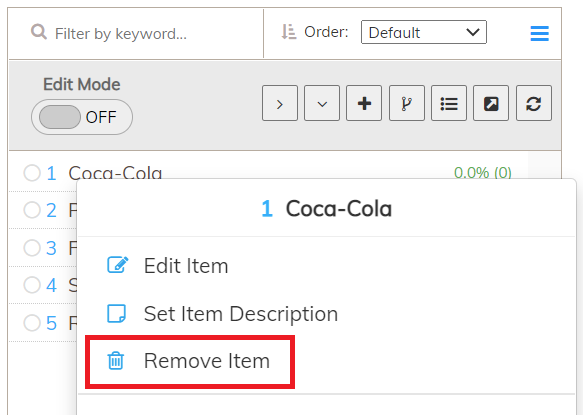
To remove an item from the codeframe, right-click on it and select "Remove Item".
Confirm by clicking the "Delete" button in the confirmation dialog: